¶ Microsoft 365/ Defender/ Entra ID Log Ingestion
To enable the Secure-ISS SOC to ingest O365 and Defender logs, Azure Active Directory must be configured to allow API calls from the Secure-ISS SOC QRadar infrastructure.
You will require a Global Administrator to be able to complete the following activities.
Do not send any confidential information to our SOC team over email. Be sure to send a link to our team via the Secure-ISS secrets site found at https://pass.secure-iss.com
Where files need to be shared, please request a secure link from our team.
¶ Azure Active Directory
¶ Application Registration
- Log in to the Azure Management Portal (https://portal.azure.com) with the credentials of the tenant that is subscribed to Microsoft Office 365.
- From the navigation menu, select Azure Active Directory.
- From the Overview pane, select App registrations, and then click New registration.
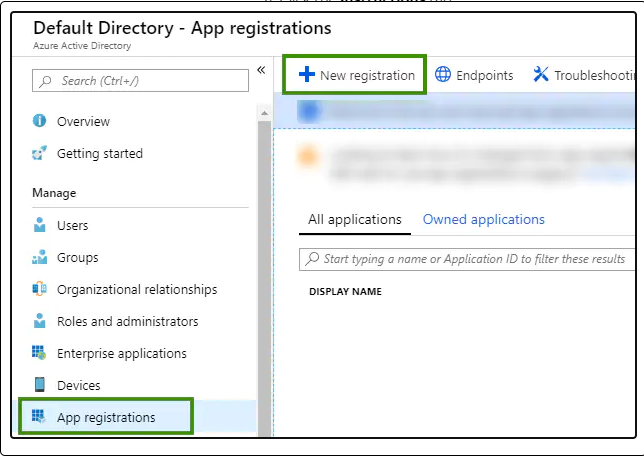
- Register the application and Enter a name for the application (I.e Secure-ISS SOC API).
- In the Supported account types section, select the type of account to use the application or to access the API.
- In the Redirect URI (optional) section, select Web, and type http://localhost in the Web field.
- Click Register. The application is created, and the overview page displays. Copy and store the Application (Client ID) and Directory (Tenant ID values). (These values needs to be supplied to the SOC Team).
¶ Client Secret Generation
Now generate a client secret for the application.
- From the Manage pane, select Certificates & secrets > New client secret.
- Select an Very Long expiry period, and then click Add.
- Copy and store your client secret key value because it can’t be retrieved later. (This value also needs to be supplied to the SOC Team).
Set the expiry to a very long time, 2 years min if possible.
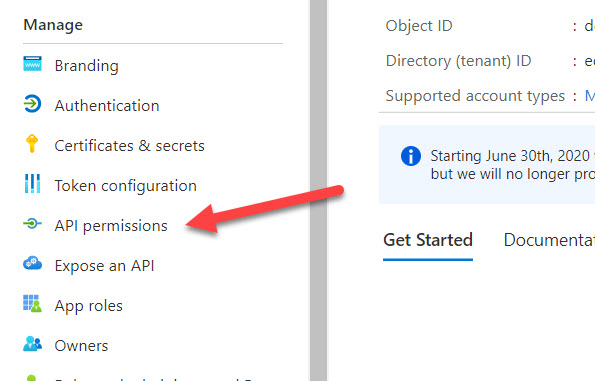
¶ Adding Permissions for the Application
Finally, we need to specify the permissions that the Microsoft Azure application must use to access Microsoft Office 365 Management APIs.
- From the Manage pane, select API permissions.
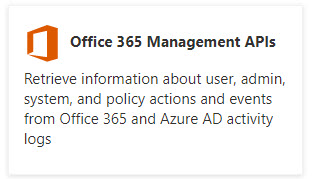
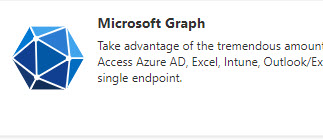
- Click Add a permission. From the API list on the right, choose Office 365 Management APIs and Microsoft Graph as shown below to add each respective API Permissions.
- Next, Select Delegated permissions, and Application permissions as per the screenshot below.
Please add the following permissions
- AuditLog.Read.All (Delegated)
- AuditLog.Read.All (Application)
- SecurityAlert.Read.All (Delegated)
- SecurityAlert.Read.All (Application)
- SecurityAlert.ReadWrite.All (Delegated)
- SecurityAlert.ReadWrite.All (Application)
- SecurityIncident.Read.All (Delegated)
- SecurityIncident.Read.All (Application)
- SecurityIncident.ReadWrite.All (Delegated)
- SecurityIncident.ReadWrite.All (Application)
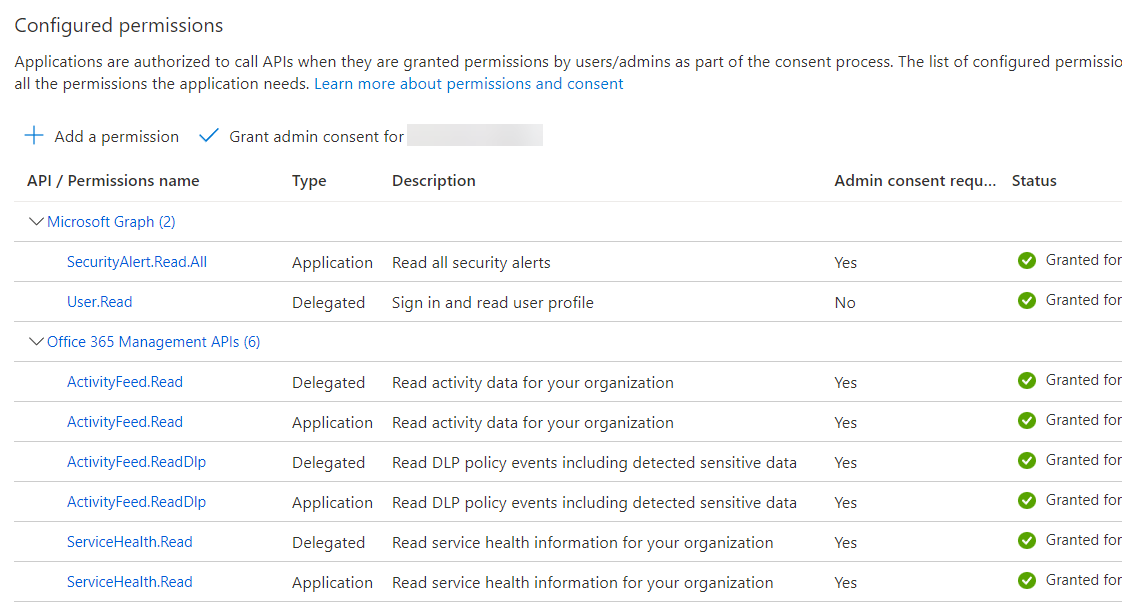
- Click Add permissions.
- In the API permissions window, go to the Grant consent section, click Grant admin consent > Yes.
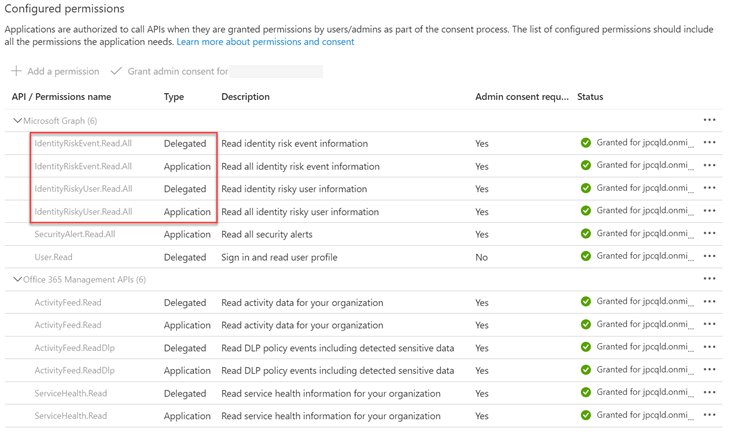
¶ Entra ID and Risky User alerting
For those clients using Entra ID (with P2 licensing), please add permissions for Secure-ISS to query for Risky User behaviour within your tenant.
Please add the following permissions
-
IdentityRiskEvent.Read.All Delegated
-
IdentityRiskEvent.Read.All Application
-
IdentityRiskyUser.Read.All Delegated
-
IdentityRiskyUser.Read.All Application
-
IdentityRiskyServicePrincipal.Read.All Delegated
-
IdentityRiskyServicePrincipal.Read.All Application
-
IdentityRiskyServicePrincipal.ReadWrite.All Delegated
-
IdentityRiskyServicePrincipal.ReadWrite.All Application
To add these permissions via Powershell check out this page:
https://learn.microsoft.com/en-us/entra/id-protection/howto-identity-protection-graph-api
More information on these permissions can be found on this page:
https://learn.microsoft.com/en-us/graph/permissions-reference
¶ Advising Secure-ISS
Secure-ISS will require the information captured above including:
- Tenant ID (This can be found on the ‘Overview’ section of the Application Registration you created for QRadar)
- Client ID (This can be found on the ‘Overview’ section of the Application Registration you created for QRadar)
- Client Secret Value (Only visible at the time of creating the secret)
Be sure to Encrypt this information via the Secure-ISS Secure Pass site found at https://pass.secure-iss.com
Once Encrypted, please send this information to your On-boarding Project Manager or to our support team at soc@secure-iss.com.