¶ Mimecast Log Ingestion
To enable the Secure-ISS SOC to ingest Mimecast logs, Mimecast Admin console must be configured to allow API calls from the Secure-ISS SOC QRadar infrastructure.
For Secure-ISS to complete the Mimecast configuration, a SiSS eg:(sissadmin@) user must be created in the Mimecast system first. Create user with Basic Administrator rights and send details securely to the SOC team.
Do not send any confidential information to our SOC team over email. Be sure to send a link to our team via the Secure-ISS secrets site found at https://pass.secure-iss.com
¶ Mimecast Setup Guide
Log into the Mimecast portal with a user with Basic Administrator permissions.
¶ Enable Logging
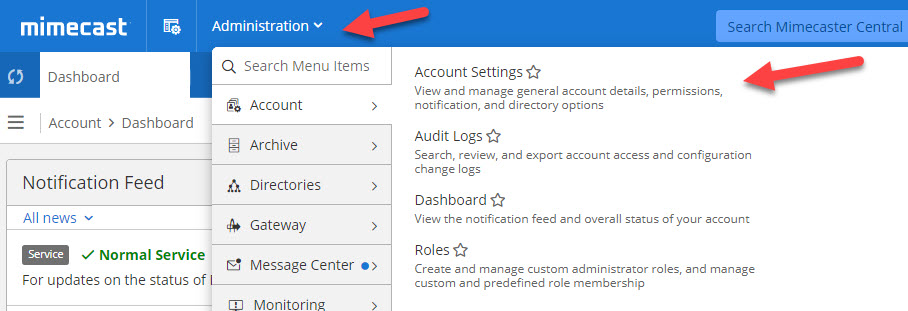
- Click on the Administration toolbar menu item.
- Select the Account | Account Settings menu item.
- Expand the Enhanced Logging section toward the bottom of the main window. Select the types of logs you want to enable, this is optional but all can be checked:
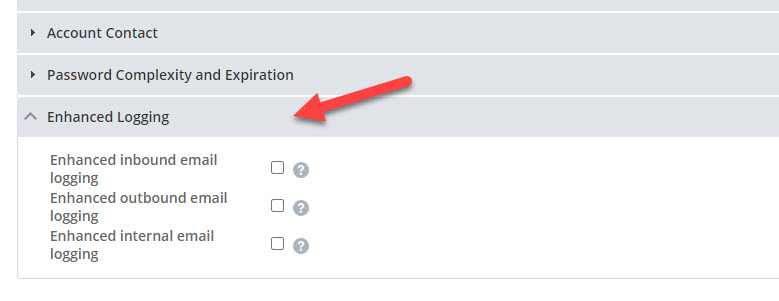
4. Click on the Save button (back up to the top of the page on the left).
¶ Create a User
Note: If SiSS is configuring Mimecast, the user has already been created, as this is what has been used to log in. Do not complete this section.
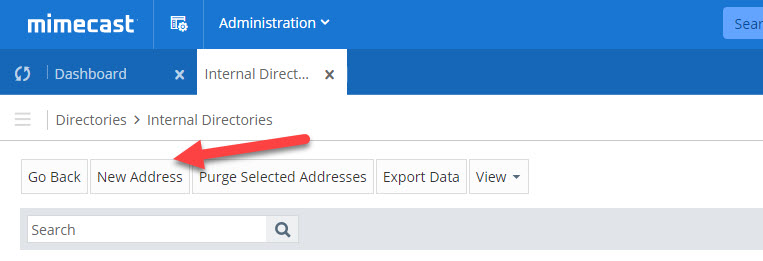
- To create a user, click the Administration toolbar and select the Directories | Internal Directories menu item.

2. Select the Domain that you would like to add a user to and click the New Address button.
3. Complete the values on the page, click the Save and Exit button.
¶ Assign User Basic Administrator Role
- Click on the Administration toolbar button and select the Account | Roles menu item.
- Right click on the Basic Administrator Role and Add the user you just created using the checkbox next to the user.
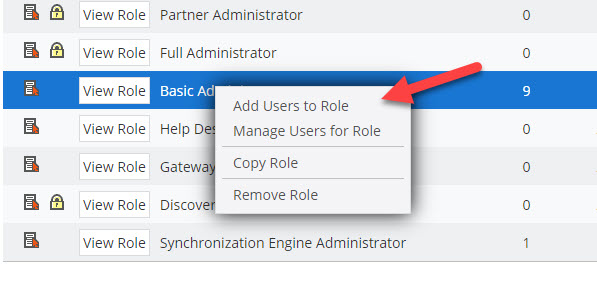
- Click the Add Selected Users button.
¶ Create a Profile Group
- Click on the Administration toolbar button and select the Directories | Profile Groups menu item.

- Create a new folder by clicking the + Icon in the bottom right hand corner of the Root Group.
- Rename this folder to SOC by typing “SOC” into the Edit Group field and hit Enter on the keyboard.
- Select the SOC Group and click on the Build button and add the user created in the previous steps. Click on Save and Exit.

¶ Configuring an Authentication Profile
- Click on the Administration toolbar button, select the Services | Applications menu item.
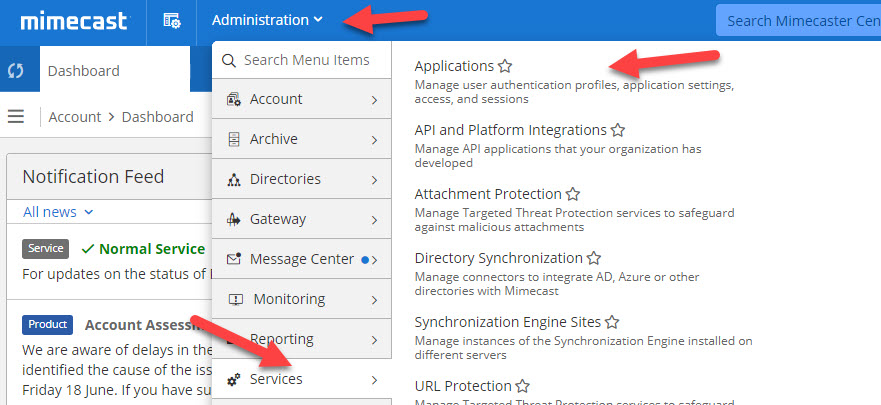
- Click on the Authentication Profiles button then the New Authentication Profile button.
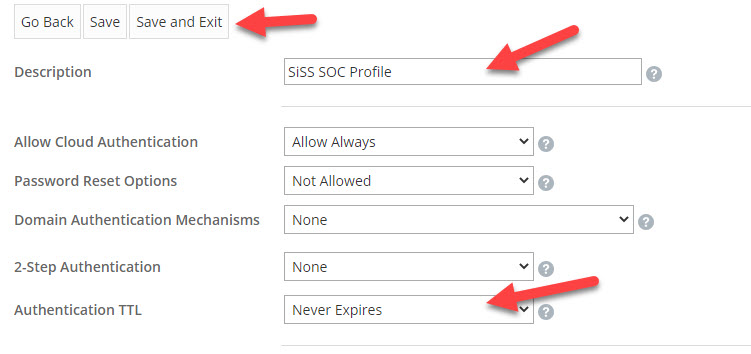
- Give a suitable description at the top and change the Authentication TTL option to “Never Expires”. Leave all other setting as default and click the Save and Exit button.
¶ Create an Application Setting
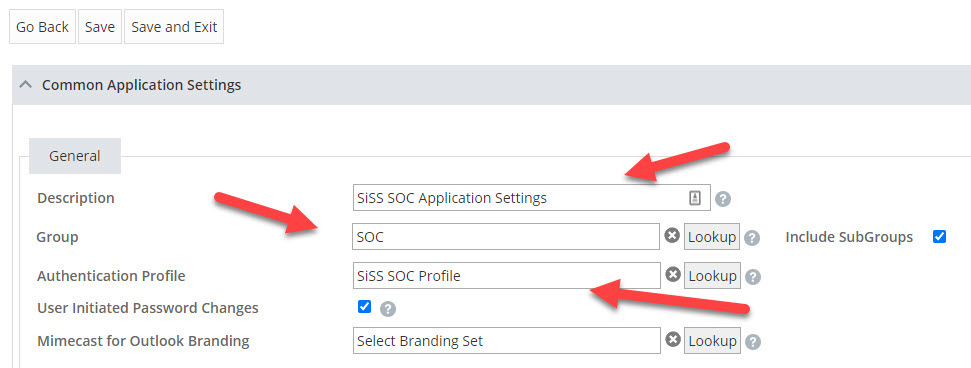
- Click on the Administration toolbar button and select the Services | Applications menu item. Click the New Application Settings button to create a definition.
- Give an apprpriate Description then select the SiSS Profile Group created in the previous step and Select the Authentication Profile, both using the Lookup Button. Leave all other settings as the default values.
¶ Add API to the Service
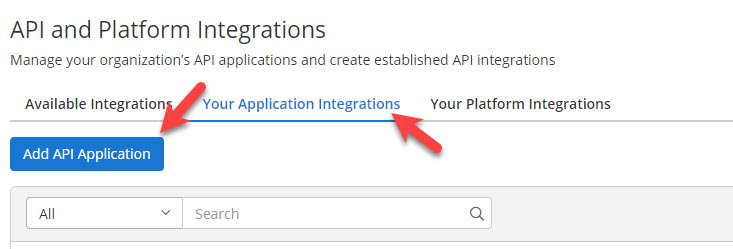
- Click on the Administration toolbar button and select the Services | API and Platform Integrations.
- Click the Your Application Integrations and click Add API Application.
- Follow the Wizard setup using entries similar to the following.
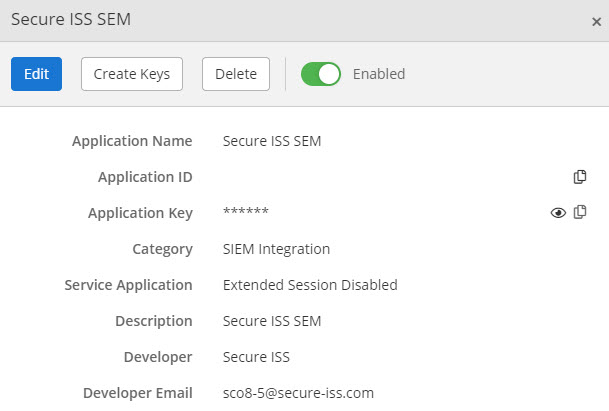
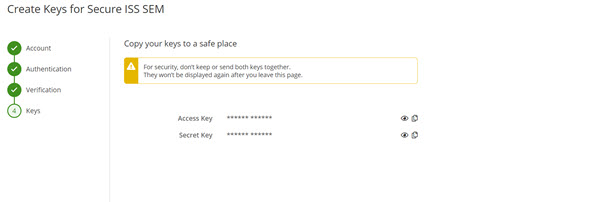
- You will need to ait 30 minutes beofre completing the next step. Once 30 mins has passed, click Create Keys. Follow the Wizard and enter the user credentials created previously when promted to do so.
- Once Keys are created, copy both the Access Key and Secret Key and store in a safe place.
- Next, click on the Administration toolbar button and select the Account | Account Settings. Locate the Account Code. It will be in the format CAU*****. (See below)
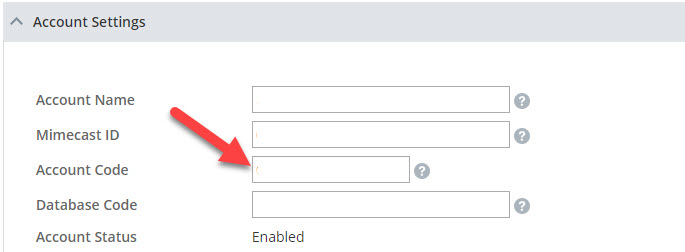
Finally, send all 3 Pieces of data send to the Secure-ISS SOC Team securely using https://pass.secure-iss.com