¶  Zimbra Email Setup
¶ Installing Zimbra Connector
-
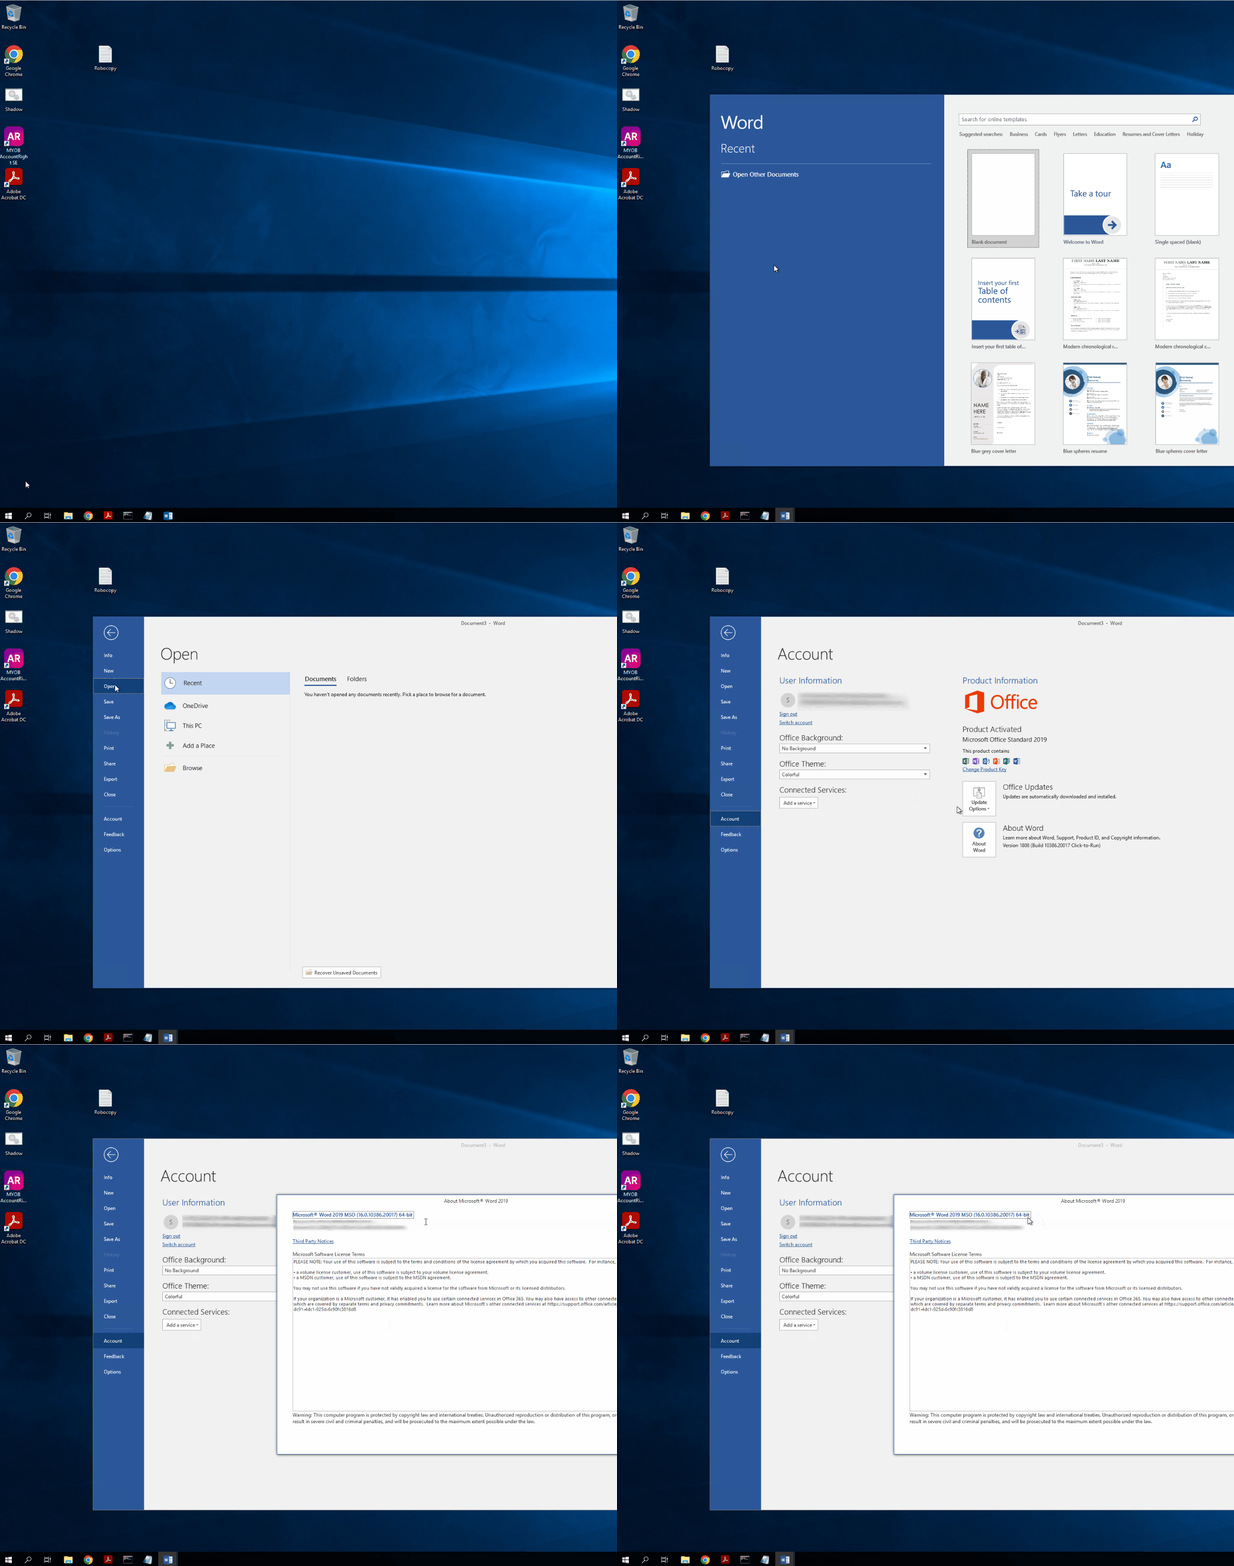
We need identifying if you are using x32 or x64 bit Office which can be found by opening Microsoft Excel or Word and then by Double Clicking on “Create New File”. Once the new file has open then go to File Account About Word/Excel.
-
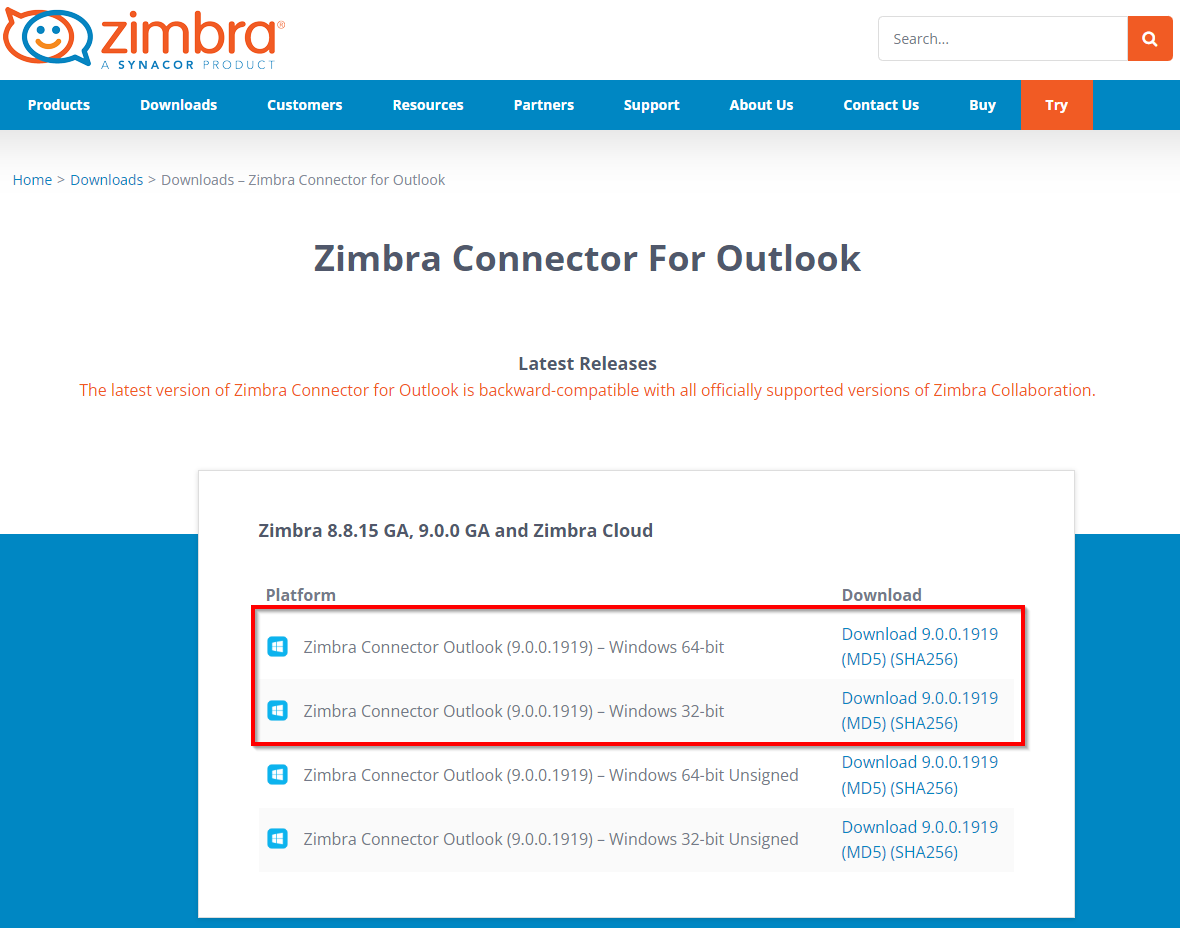
Now go to Zimbra Connector select 32-bit or 64-bit connector version based on step one outcome.
-
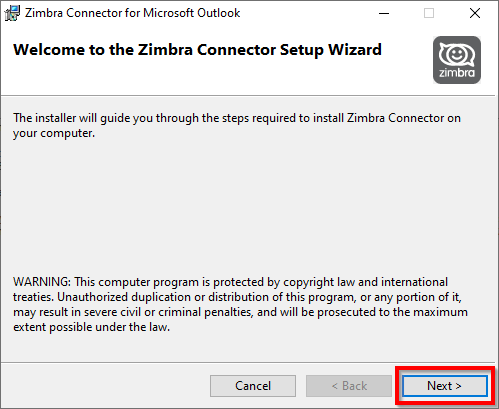
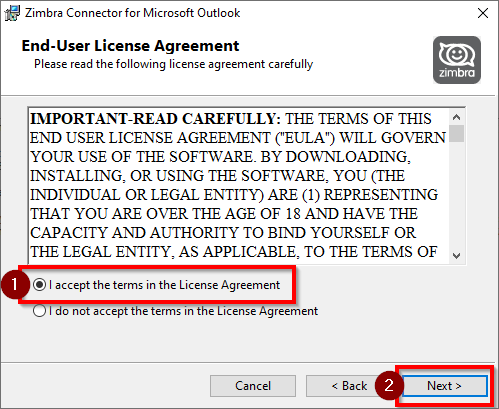
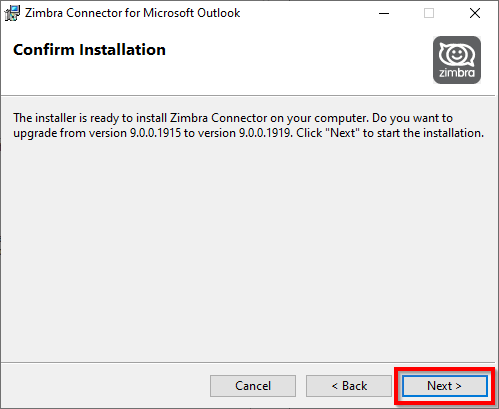
Run Zimbra Connector installer and select Next Agree to License Agreemnet and select Next select Next to Start Installation.
¶ Setup Zimbra Email
-
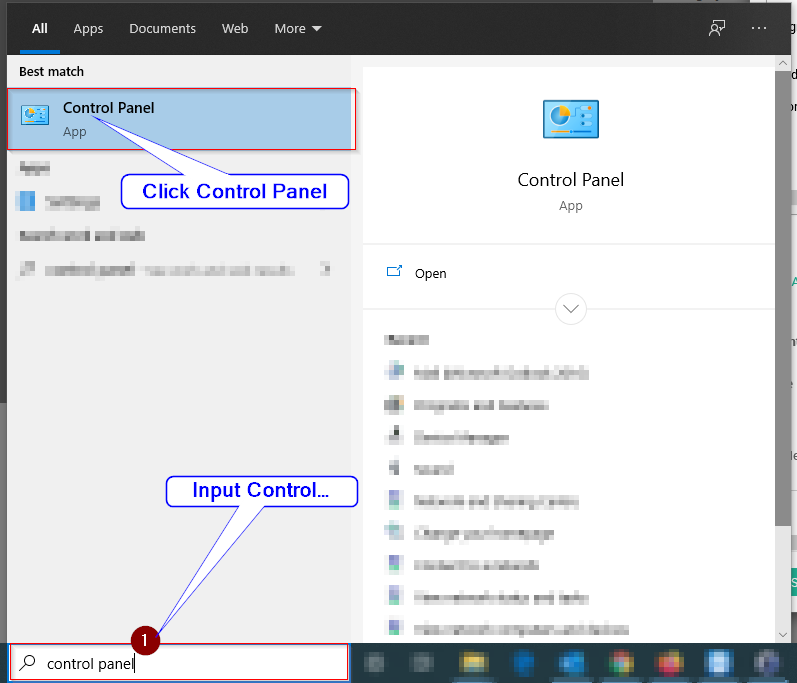
Open Control Panel - This can be achieved by left clicking in the windows search field in the bottom left corner of your screen, typing “Control Panel” and navigating to the icon in the search results.
-
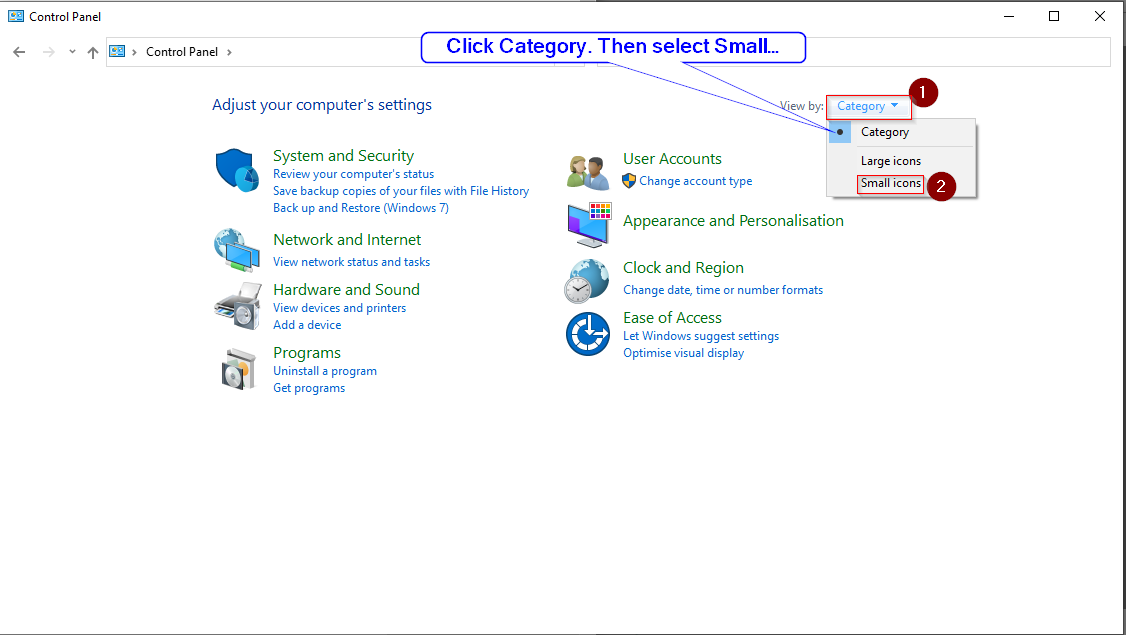
Set View by: to Small icons - In the top right hand corner of the Control Panel window, click the dropdown options next to “View By:” and select Small Icons
-
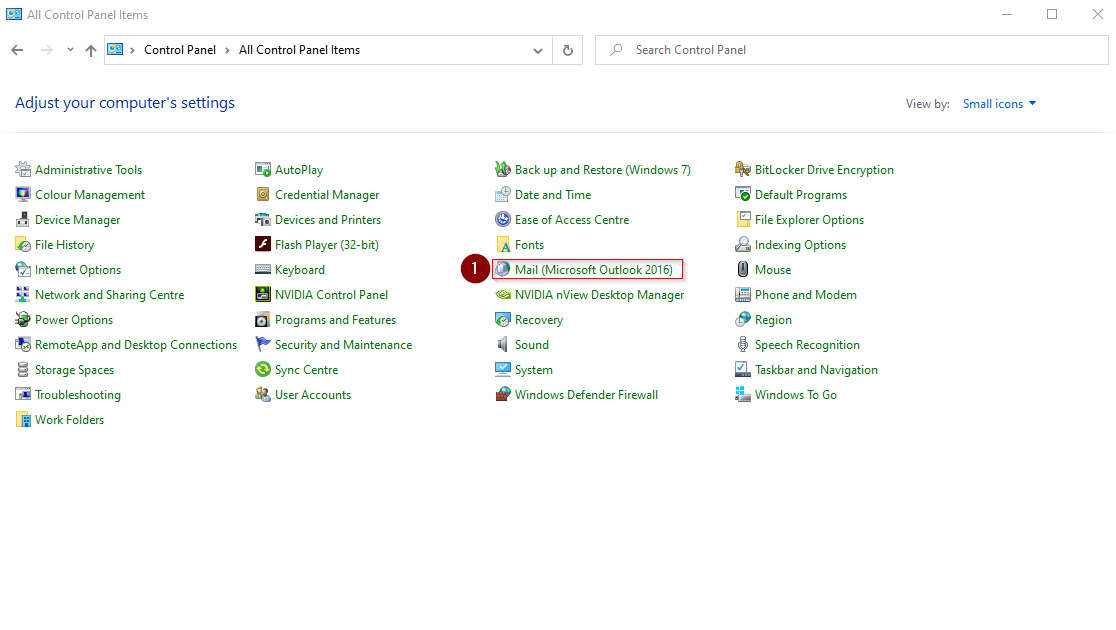
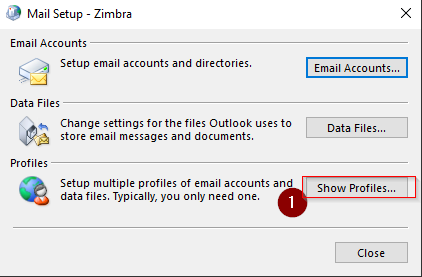
Select the “Mail” option from the list on-screen of computer settings, a new window should appear “Mail Setup”
-
Click the “Show Profiles Button”
-
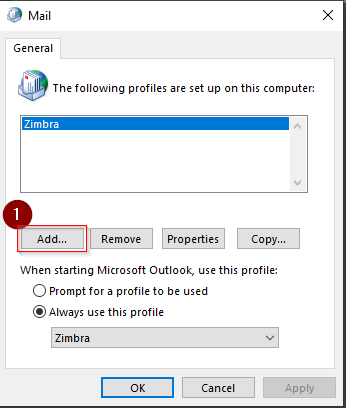
Click the “Add Button”
-
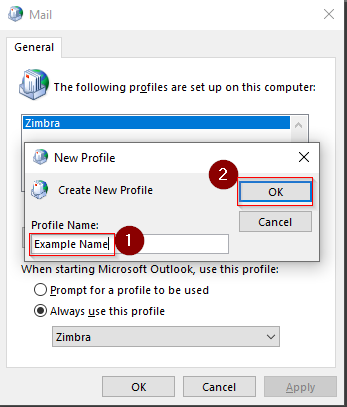
Input any name into the Profile Name field (it is just a descriptor), then click “Ok”
-
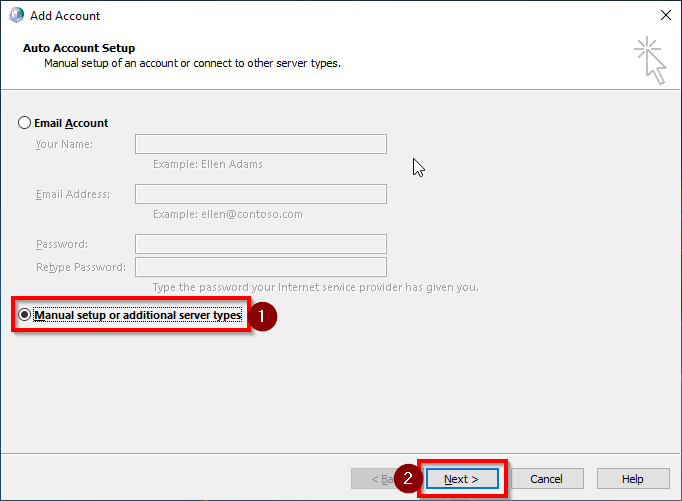
Selcet “Manual setup or additional” server types and click “Next”
-
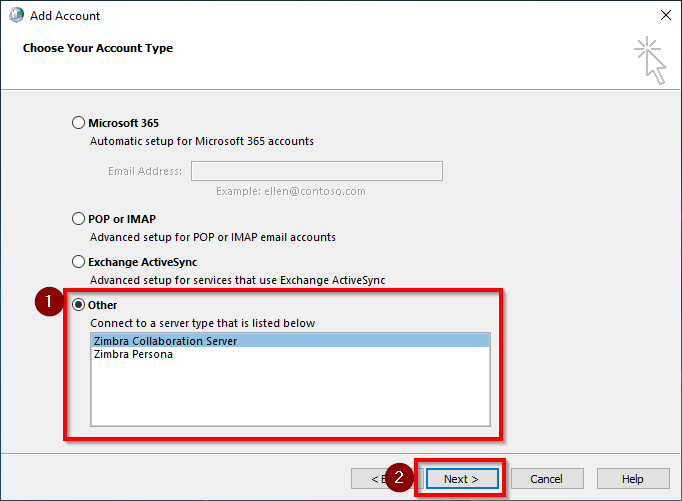
Selct “Other” and click “Next”
-
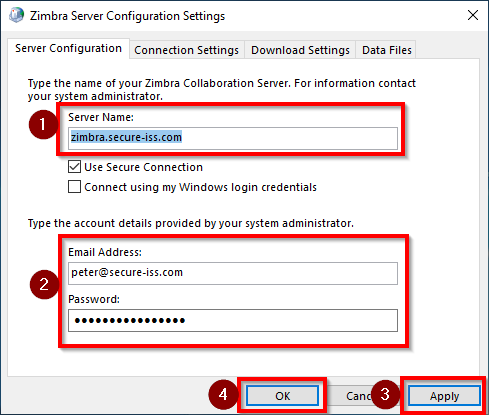
For the “Server Name” use:
zimbra.secure-iss.comand then use you Zimbra credntials provided by Secure-ISS for “Email Address” and “Password”. Then click "Apply" and wait for connection check.
If you have error message then double check make sure that Server Name, Email or Password have no miss typos.
If no error message appeared then click “OK”.
-
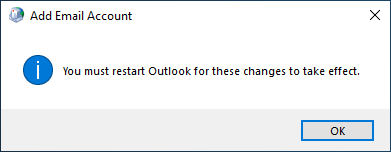
This is just a reminder for you to restart your Outlook once done just click “OK”.
-
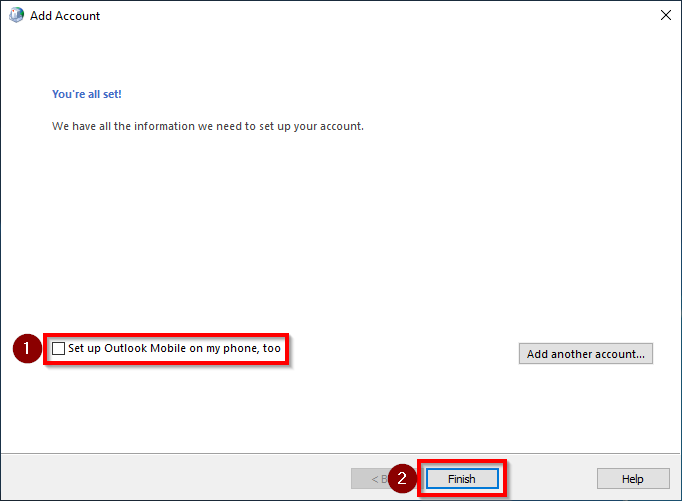
Untick “Set up Outlook Mobile on my phone, too” and click “Finish”.
-
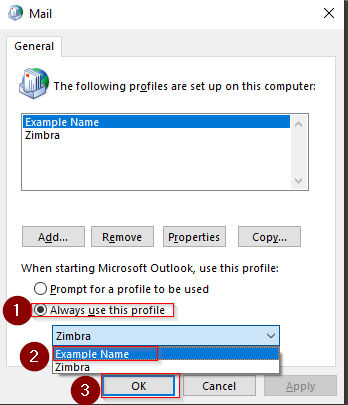
Within the Mail Setup window, you will see a checkbox for “Always use this profile” ensure that it is ticked. Select your new profile you created from the drop-down menu below this checkbo THEN Click “Ok”
-
Now Open/Launch Outlook
¶ iOS 18 Specific Instructions
Select Settings
Mail Mail Accounts Add Account Microsoft Exchange.
¶ iOS 14 Specific Instructions
Select Settings
Mail Accounts Add Account Microsoft Exchange.
¶ iOS 13 Specific Instructions
Select Settings Passwords & Accounts Add Account Exchange.
-
Next enter your email address and a description. The description is just a friendly name, it has no effect other then visual, so let’s just name it something like “Work Email”.
Select “Next” when done. -
In the next popup, select “Configure Manually”.
-
Enter the details below:
Server:zimbra.secure-iss.com
Domain:
Username: <Email>
Password: <Password>
Then select Next. -
Finally choose what you wish to sync. When you’re finished, select “Save”.
¶ Android version 12 and Older
-
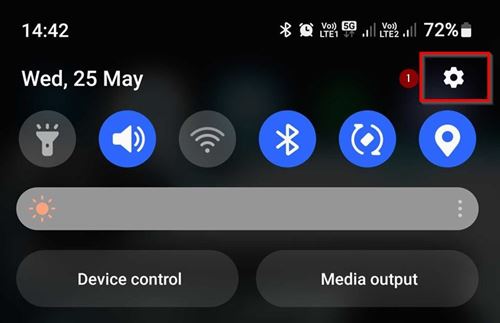
From top of your screen swipe down to bring “Drop down manu” and enter the “Settings” menu by clicking on gear icon in the top left corner.
-
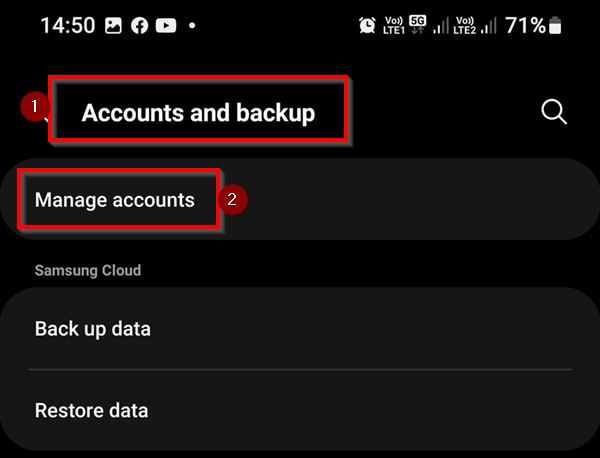
Open the “Accounts and backup” tab and select “Manage accounts”.
Note: Settings menu, the icon will be a gear. Open the Accounts tab and select Add account.
-
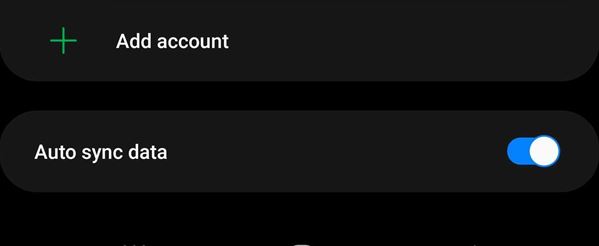
Scroll down to the end and select “Add account”.
-
Select “Microsoft Exchange ActiveSync” for the account type and select “Manual Setup”.
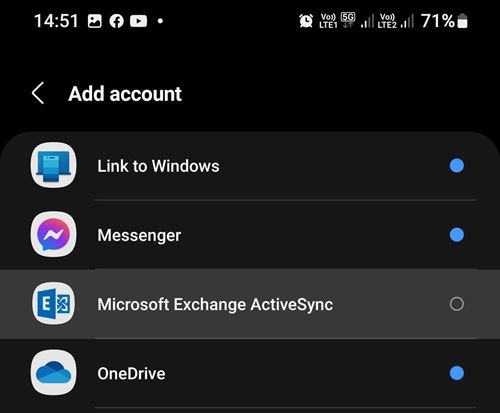
Note: On earlier versions of Android this may be called “Corporate” or “Corporate Sync”
-
Input your credrentials and then select “Manual setup”.
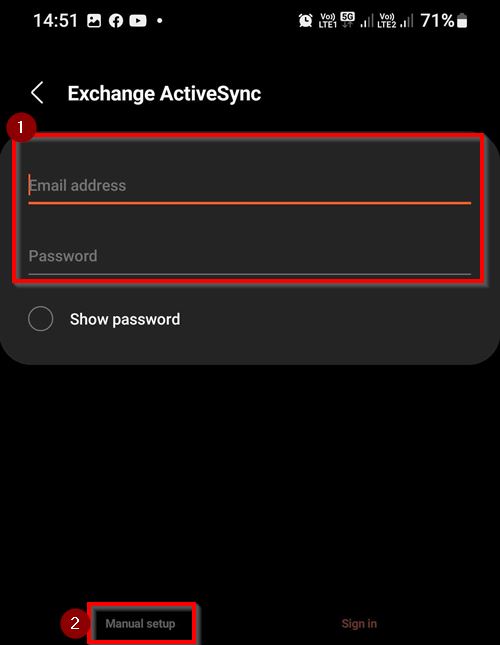
-
Enter the details below:
Email address: example@secure-iss.com
username: example@secure-iss.com
Password: Password
Exchange Server:zimbra.secure-iss.com
Port: 465
Use secure connection (SSL):Ticked
-
After account has been Signed in, you might get prompt to Apply security settings? Select “Apply” and you should get another prompt Activated device admin app select "Activate".
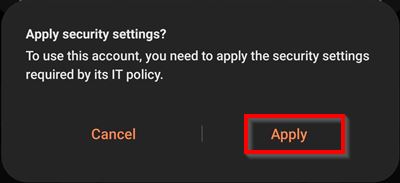
-
The last page gives you the option to which items you would like to Sync suck as Contacts, Email, Calender and Tasks.
Select System Preferences Internet Accounts Add Account Add Other Account…
-
Enter your the following details:
Email Address: example@secure-iss.com
Password: Password
Account Type: IMAP
Incoming Mail Server: zimbra.secure-iss.com
Outgoing Mail Server: zimbra.secure-iss.com -
After the account has been signed in, you may be prompted to select what applications the email address has access to. Select the applications applicable.
-
Open the mail application on the device and confirm that the account is there and that it is actively loading the emails.